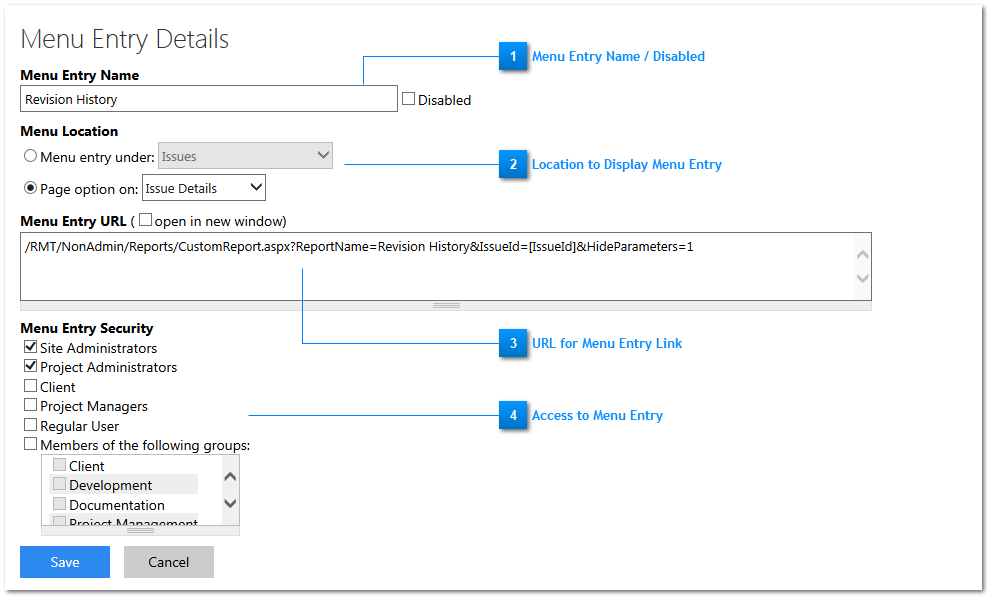
Each Menu Entry requires a name. This is the name that will appear in the menu or on the page. Menu entries can be disabled by checking the box.
Location to Display Menu Entry
The Menu location determines where the menu entry will appear. Menu entries can be added to the main menu bar for all pages by using Menu entry under:
Choices are:
Issues
Filters
Reports
Administration
Security
Projects
Customize
System
Other
Help
Current User (user ID on far right of main menu bar)
Or, menu entries can appear as a Page Option for the Issue Details page or on the stock RMTrack reports; Daily Summary, Release Notes, Summary Trends, and Issue Distribution.
This is particularly useful on the Issue Details page for example to call an issue specific report and pass the Issue ID in the URL link.
URL for Menu Entry Link
Enter the URL for the menu entry link and indicate if this link should open in a new window or use the current one.
As mentioned above, one of the uses for custom menu entries is to add a page option to the Issue Details page that links to report or something that needs additional information, for example the issue number that was being looked at or the user that is currently logged on.
Custom menu entry URL’s support inserting values from the ASP.NET programming model objects Application, Session and QueryString (in that order). The contents of the QueryString object are dependent on the current URL. For example on the Issue Details page the IssueId QueryString value is always present (may be -1 to indicate a new issue, or a positive number to indicate an actual issue).
Access to Menu Entry
This section controls who can see and access the custom menu entry. Access can be granted based on Security Type or Group membership.