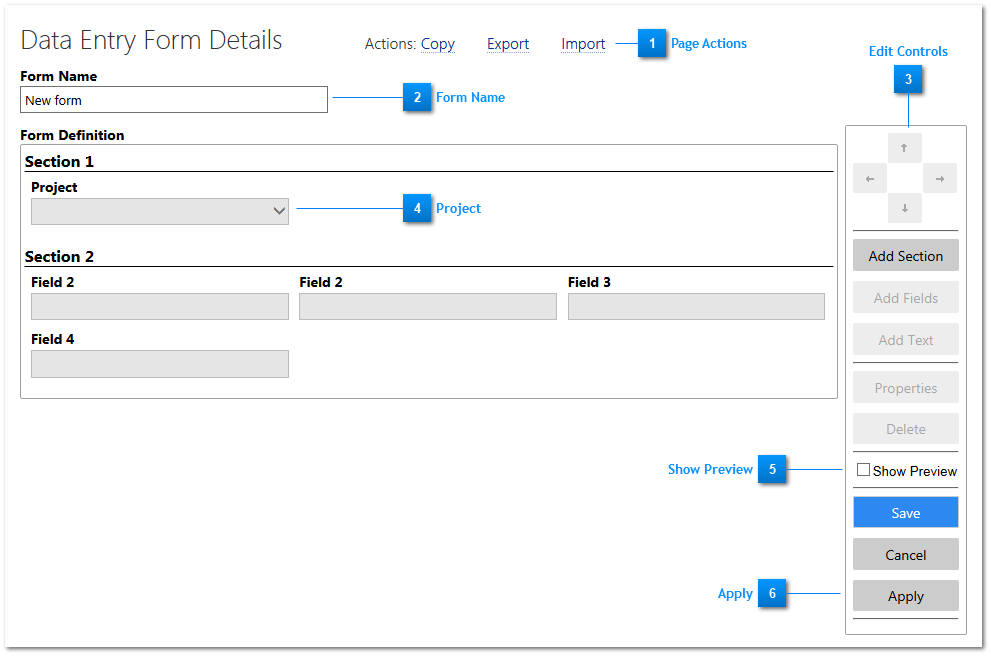
Clicking the Copy… link at the top of the page will copy the existing form to a new form.
Forms can be Exported and Imported between RMTrack sites. This is useful when using a test or development site of RMTrack.
NOTE: When importing a data entry form, all fields in the exported form must already exist in the database being imported into.
Form Name
Each data entry form must be given a unique name.
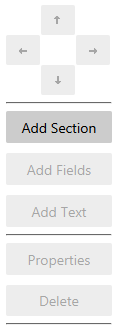
Edit Controls
Data Entry Forms are made up of Sections and each section contains one or more Fields. Clicking on a section will highlight that section and activate the Edit Controls for that section. Clicking on a field will highlight that field and activate the edit controls for that field.
NOTE: Right clicking on a section or a field will also offer the Edit Controls in a context menu.
Positioning
Sections and fields can be moved by using the arrows at the top of the edit controls section. If the spot being moved to is occupied then the sections or fields will be swapped. Sections and fields can also be moved by selecting a section or a field and dragging and dropping to the desired position using the mouse.
Add Section
Clicking Add Section will add another section to the current data entry form below the currently selected section and will open the properties dialogue for sections.
Add Fields
Clicking Add Fields will display a list of fields so far not used on this form. Checking the boxes beside the field name and clicking OK will add those fields beside or below the field currently selected.
The field selector dialogue also contains the ability to create a New Field... allowing fields to be added to the database directly from the forms designer. For more information please see the section New Issue Field in this guide.
Clicking on Properties will bring up the properties dialogue for the selected item (Section, Field, or Text).
Delete
This will delete the selected item on the form e.g. Section, Field or Text.
Project
All data entry forms must include a project field.
Show Preview
Checking the Show Preview check box will take the form out of edit mode and give a rough approximation of what the form will look like. However, some attributes will not be shown, for example span rows and span columns do not show in Preview. To truly see what a form will look like it should be viewed on the Issue Details page.
Apply
This will save the changes to the form without leaving the page. This is especially useful when designing a form by allowing the changes to viewed simultaneously in another window.
HINT: A good practice is to create a test project and assign it the form being designed or modified. Open two browsers (or two tabs), one on the forms designer, and one creating a new issue in the test project. Make a change to the form and click Apply then switch to the other browser and click refresh to see your changes.
HINT: Care should be taken when designing data entry forms if you use field level security to deny access to issue fields for certain groups. When these users create a new issue or view an existing issue, there will be blank spaces on the form where the fields they do not have access to are located. In these cases it may make sense to group restricted access fields together, perhaps at the bottom or side of the form.
HINT: Form design can be tricky! RMTrack support has lots experience designing forms and we are happy to assist. Just contact support@rmtrack.com.